Essential Guide to Aluminum Painting: Tips and Techniques for Success
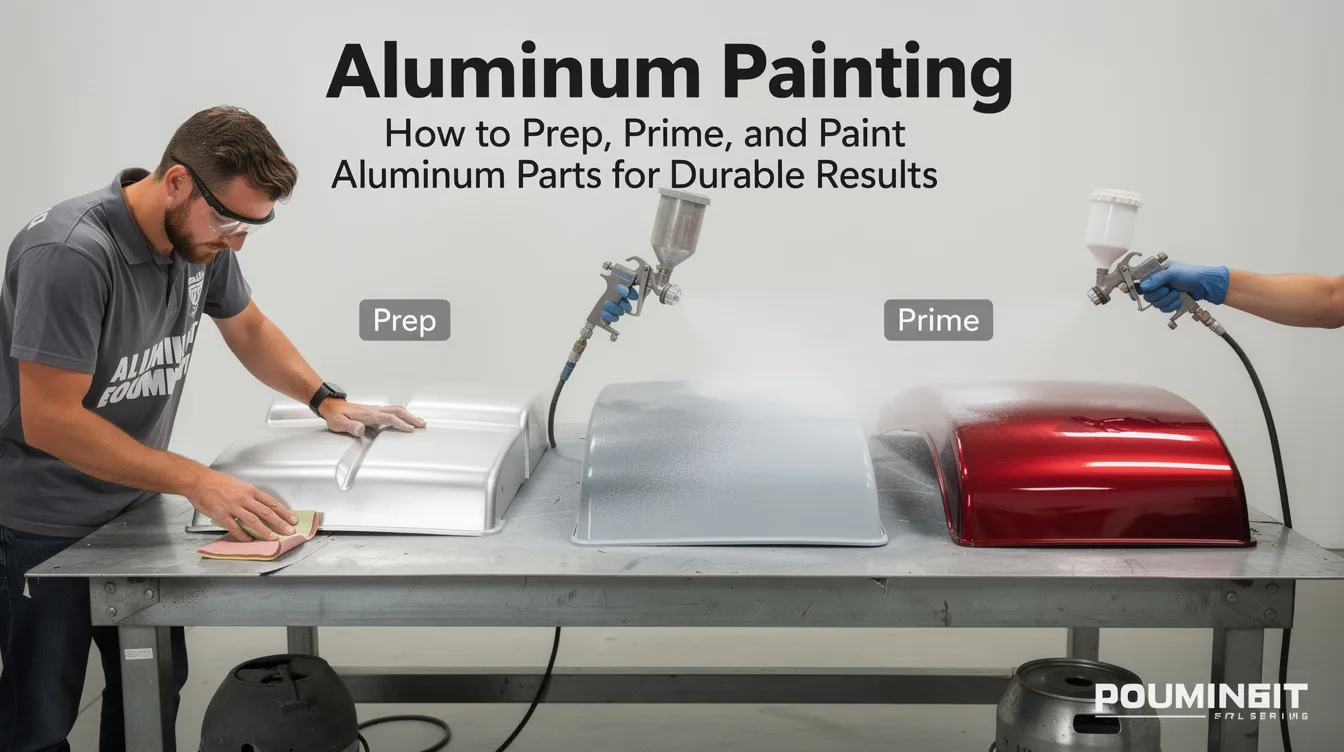
Aluminum Painting: How to Prep, Prime, and Paint Aluminum Parts for Durable Results
Painting on aluminum requires careful surface preparation for adhesion, the right primer chemistry, and a controlled application process. Get any of those wrong and you end up with peeling, chalking, or underfilm corrosion that costs more to fix than it cost to do it right the first time. This guide walks OEM engineers and shop teams through every step-from cleaning raw aluminum to final inspection-so the finish actually holds up.
Why Aluminum Painting Matters for OEM Parts
Painting aluminum correctly is more important than ever for OEM components. Aluminum, while lightweight, still develops surface oxidation and is susceptible to corrosion in humid or salt environments. A well-executed paint system delivers corrosion resistance, consistent branding colors, and wear protection across the full service life of the part.
-
Applications span a wide range: CNC machined housings for electronics, die cast enclosures and motor covers, sheet metal brackets, and aluminum panels for equipment enclosures and building facades.
-
The process covered here follows a clear line: clean → sand → apply self etching primer on raw aluminum → top coat → seal and cure where needed.
-
Aluminum painting panels are lightweight and rigid surfaces, which makes them popular across industries from architecture to consumer electronics-but that same rigidity means any coating failure is immediately visible and hard to hide.
-
Painting on aluminum panels offers better durability than canvas and many other substrates, provided the surface prep is done properly.
-
Anebon Metal Products Limited is a precision metal fabrication partner that can deliver aluminum parts pre-finished with anodizing, powder coating, or wet paint-or ship them cleaned, masked, and ready for the customer’s own painting process.
Understanding Aluminum Surfaces Before You Paint
Before you pick up a spray gun or crack open a can of primer, you need to understand what you are working with. The aluminum surface you are painting dictates everything about how you prep, prime, and coat it.
-
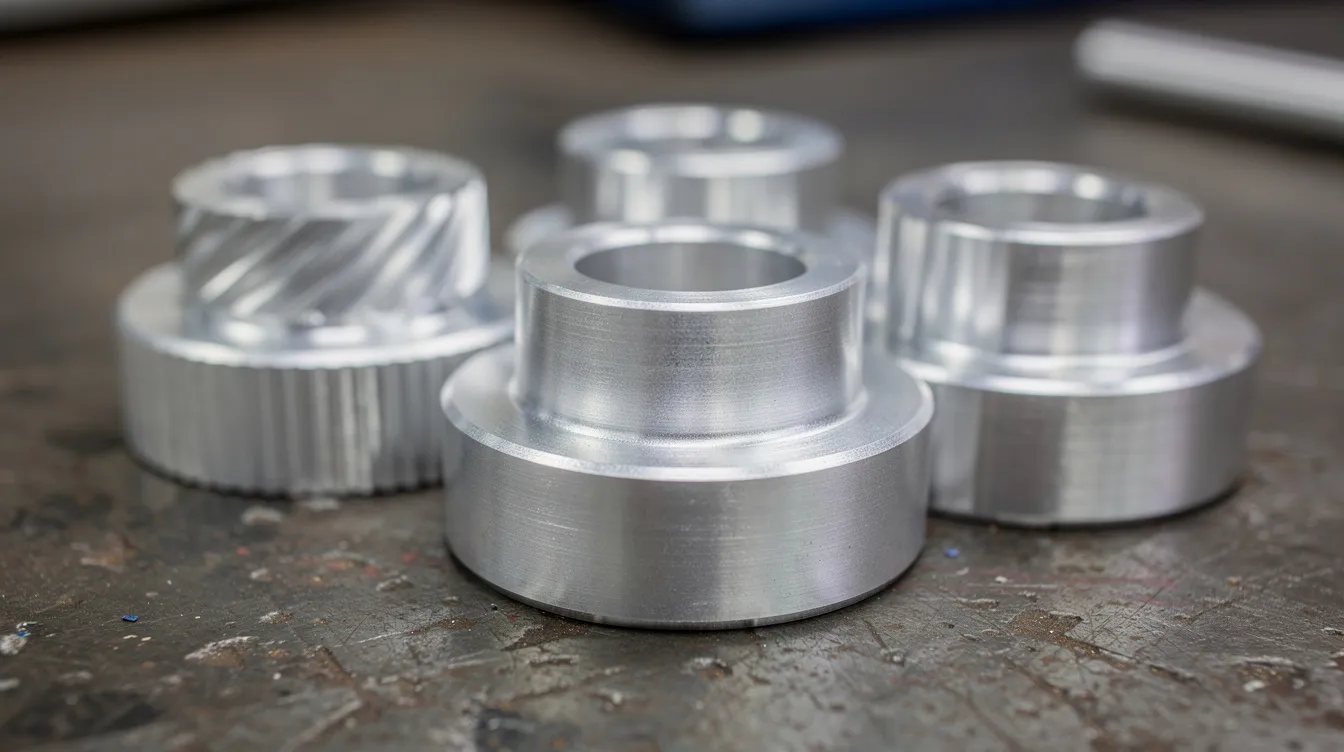
“Raw aluminum” in a manufacturing context means the aluminum substrate is freshly machined or formed with minimal treatment. Common alloys include 6061-T6 (extruded or CNC machined), die cast A380, or sheet stock 5052/6063 straight from the mill.
-
Aluminum forms a passive oxide layer that prevents paint from sticking. This natural oxide (Al₂O₃) develops within minutes of air exposure. It is chemically stable but weakly bonded, and if you paint over it without proper treatment, the coating will eventually delaminate.
-
Previously coated aluminum (old paint or powder coat) needs scuffing and compatibility testing. Anodized parts may need conditioning or removal of the seal layer before they accept paint. Bare aluminum panels and extrusions need both mechanical and chemical treatment.
-
Concrete examples: painted CNC enclosures for electronics where internal dimensional tolerances of ±0.002 mm must be preserved; architectural aluminum panels for building facades exposed to sun, rain, and thermal cycling; automotive underbody brackets facing salt, mud, and mechanical abrasion.
-
The preparation method varies between thick castings (which may have porosity and trapped machining lubricant), thin sheet metal (where warping from aggressive sanding is a risk), and precision CNC parts with tight tolerances that cannot accept heavy film buildup.
Supplies and Safety Setup for Painting Aluminum
Having the right tools, chemicals, and safety gear on hand before you start eliminates interruptions that let contaminants settle on your prepped surface. Here is what you need.
-
Cleaning agents: industrial alkaline degreaser, acetone or isopropyl alcohol (90%+ purity), clean lint-free rags. White vinegar can be used to degrease and etch aluminum surfaces as a low-cost alternative in some hobby or light-duty situations, though industrial shops typically prefer dedicated metal prep chemicals.
-
Abrasives: 80–120 grit sandpaper for heavy oxidation or coating removal, 240–320 grit for fresh machined surfaces, 400+ grit for finish sanding after primer. Scotchbrite pads for edges, fillets, and corners.
-
Primer and paint: self etching primer formulated for aluminum and non-ferrous metals, epoxy or polyurethane top coat, optional enamel or clear sealer. Aluminum painting panels can be purchased pre-primed or prepared from some suppliers, reducing shop-side prep time.
-
Etching chemicals: industrial shops may use phosphoric acid etch solutions instead of household stuff to profile the aluminum surface before priming. You can etch aluminum surfaces with phosphoric acid for better bonding, and this method is common in aerospace and marine work.
-
PPE: nitrile gloves (to prevent finger oils from contaminating the surface), safety glasses or full face shield, organic vapor respirator rated for solvents and acid mists. This nasty stuff-solvent vapors, acid mist, aluminum dust-requires serious respiratory protection, not a paper mask.
-
Masking and environment: high-temperature masking tape, masking film to protect threads, precision fits, and unpainted surfaces. Work in a well-ventilated spray booth or outdoor area. Monitor temperature (aim for 20–25°C) and relative humidity (below 60–70%).
-
Anebon can deliver parts already cleaned, masked, and ready for the customer’s own painting process if requested-reducing your prep time and improving batch consistency.
Step 1 – Clean the Aluminum Thoroughly
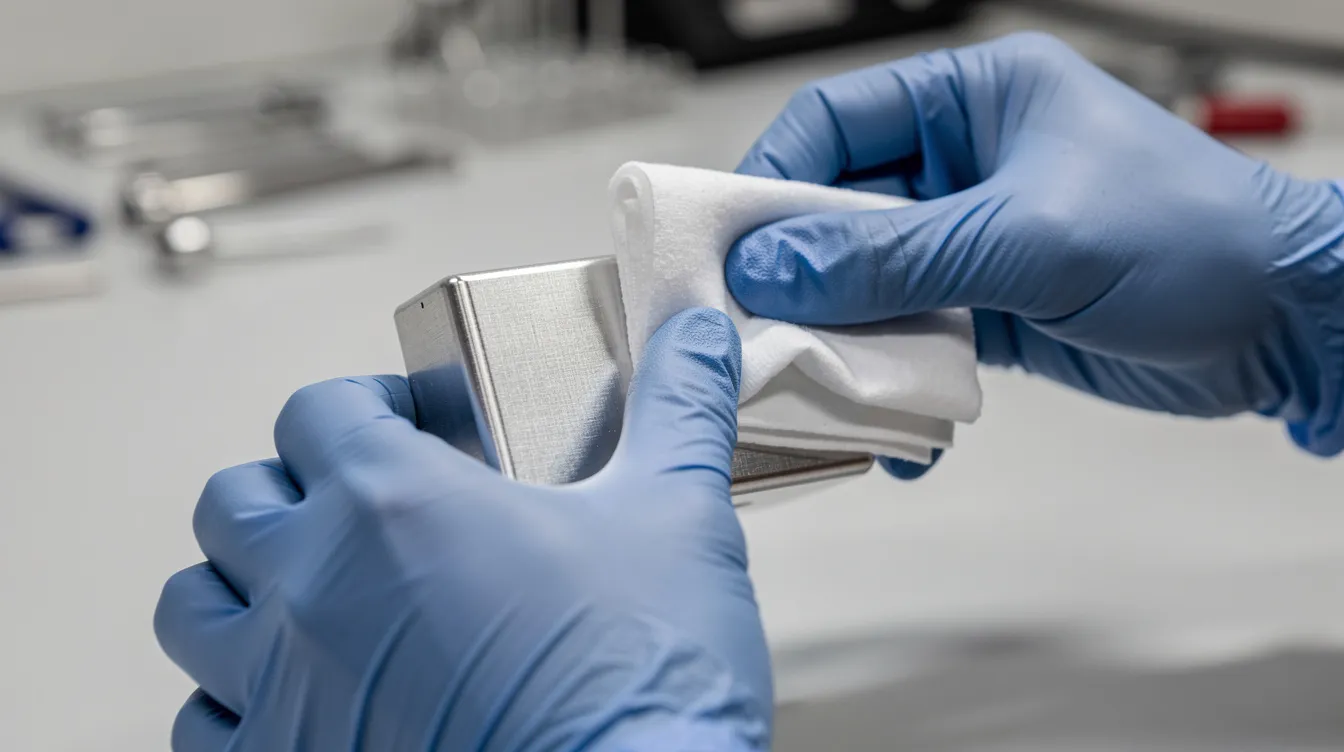
Surface cleanliness is the single most important factor in whether paint will stick to aluminum. Thorough cleaning is necessary to remove oils, dirt, and dust from the aluminum surface before any other prep work begins. Degreasing prevents contamination and issues like fisheyes in the paint.
-
Start by wiping the part with a dry cloth to remove loose dust and particles from machining or handling.
-
Wash with hot water and an industrial degreasing cleaner. Scrub any visible residue. For stubborn machining coolant on CNC or die cast parts, a second wash cycle may be needed. Use a clean container of fresh solution-do not recycle dirty wash water.
-
Remove any plastic film from sheet aluminum panels before washing. Many coil-coated or mill-finished sheets ship with protective film that traps dirt underneath.
-
Clean aluminum with acetone or isopropyl alcohol as a final solvent wipe to remove machining oils, fingerprints, and coolant residue. This step is non-negotiable for CNC and die cast parts.
-
Use clean lint-free rags and replace them frequently so oil and dirt are not smeared back onto the raw aluminum surface. For electronics or medical parts, avoid lint completely.
-
Allow the cleaned aluminum to dry completely before painting. Air dry or use a low-temperature forced-air oven (40–60°C). Typical dry time for small aluminum parts is 15–30 minutes under ambient shop conditions. Do not rush this-residual moisture trapped under primer causes blistering.
-
Aluminum oxidizes rapidly upon exposure to air, necessitating prompt priming after cleaning. Once you have a clean, dry surface, move to sanding and priming without unnecessary delay.
Step 2 – Sand and Mechanically Prep the Surface
Sanding creates microscopic grooves that provide a mechanical grip for paint. Without this physical “tooth,” even the best primer struggles to bond reliably over the long term. Lightly sanding the surface improves adhesion of paint on aluminum significantly.
-
For heavily oxidized or previously painted surfaces, start around 120–180 grit to remove the old material. For fresh CNC machined surfaces that are already fairly smooth, begin at 240–320 grit. You can also sand the surface with 80 to 100 grit sandpaper when dealing with rough castings or heavy mill scale that needs aggressive removal.
-
Pay special attention to corners, edges, and fillets. Coatings often fail first at sharp transitions because film thickness thins naturally at these points. Scuff these areas with sandpaper or scotchbrite pads to ensure uniform abrasion-do not skip this or you will see edge creep and delamination within months.
-
For decorative parts-visible aluminum panels on machinery, consumer electronics enclosures-finish sanding with 400+ grit to reduce scratch lines that might telegraph through paint gloss. The idea is to create tooth without visible scratch marks.
-
After sanding, remove all dust with oil-free compressed air and a clean solvent wipe. Sanding dust left on the surface creates pinholes and adhesion failures. Keep the air supply clean and the painting area covered to prevent contamination.
-
Lightly sand the aluminum surface before applying primer-this is your last chance to catch imperfections. Inspect the surface area under good lighting. Any shiny, un-scuffed spots will become failure points.
-
Safety reminder: wear a dust mask (or respirator) and eye protection when sanding aluminum, especially during power sanding. Aluminum dust is fine, flammable, and a respiratory hazard.
For a more detailed walkthrough on sheet material specifically, see our guide on how to paint aluminum sheet metal.
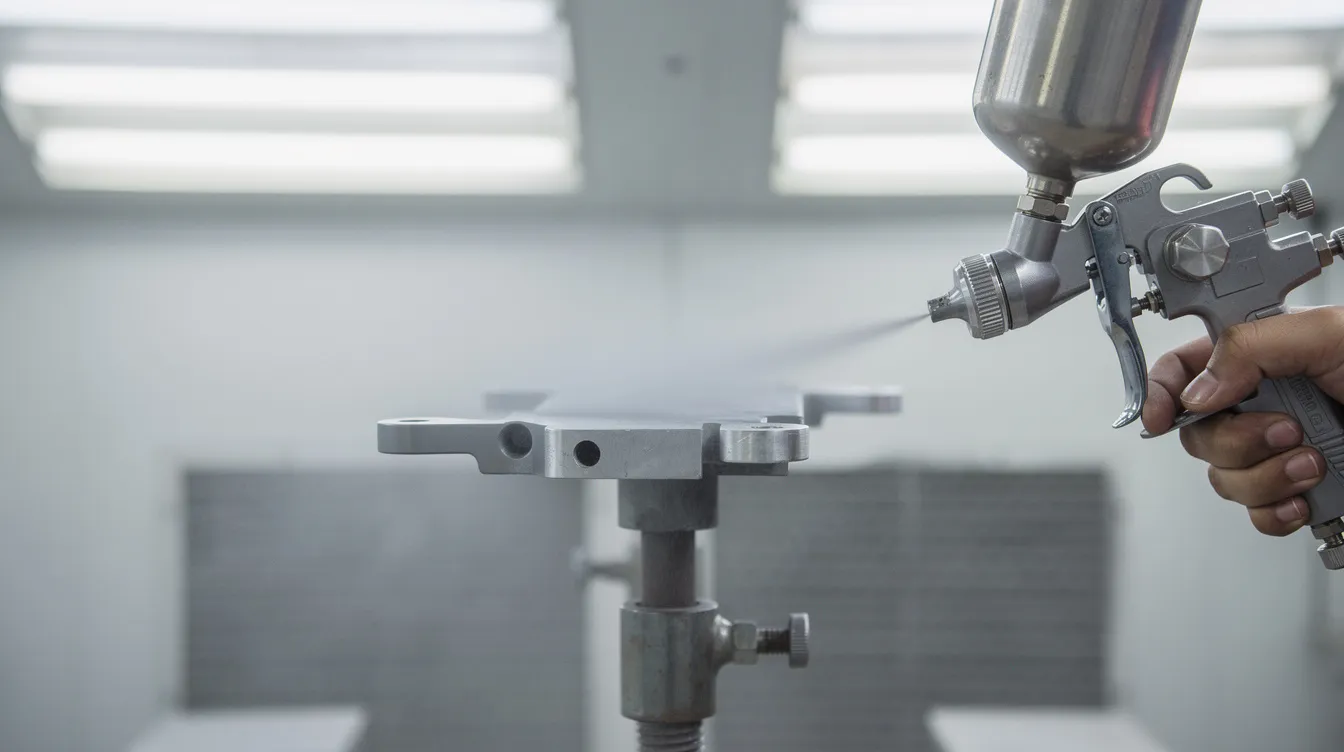
Step 3 – Apply Self Etching Primer on Raw Aluminum
A self etching primer is a primer that contains acidic chemistry-often phosphoric acid or organoacid compounds-that lightly etches into the aluminum oxide layer, creating a chemical bond rather than relying solely on mechanical adhesion. Self-etching primer is crucial for painting aluminum because most paints, including oil paint and standard oil primer, will not adhere reliably to bare aluminum without this chemical bridge. Self-etching primers chemically bond to aluminum surfaces in a way that conventional primers simply cannot match.
-
Use a self-etching primer for best adhesion. Choose one formulated specifically for aluminum and other non-ferrous metals. OEM-grade versions often come in gray or green. Many are 2-component activated systems. Zinc phosphate is commonly used in modern self-etching primers to improve corrosion resistance at the primer-metal interface.
-
Self-etching primer is crucial for painting aluminum panels as well as small aluminum parts. Apply primer in thin coats for best adhesion-light, even passes sprayed at the manufacturer’s recommended distance. Avoid heavy wet layers that run, sag, or trap solvent underneath.
-
Typical flash and dry times: touch dry in 5–10 minutes between passes, sandable dry in 20–60 minutes at 20–25°C. Always confirm the product data sheet for the specific material you are using. Brands like sherwin williams and other industrial coating manufacturers publish detailed information in their technical data sheets.
-
Use 400 grit sandpaper after applying self-etching primer to remove dust nibs and ensure a smooth base for the top coat. Wipe with a tack cloth to pick up residual particles.
-
Target a dry film thickness (DFT) of approximately 0.5–1.0 mil (12–25 µm). Excessive thickness risks solvent entrapment and adhesion failure. The point is to prime the surface, not to block it with a thick layer.
-
For highly critical components-marine hardware, outdoor architectural aluminum panels-a two-step system of self etching primer plus epoxy primer may be specified. This approach seals more aggressively and improves long-term corrosion resistance, especially in salt air environments.
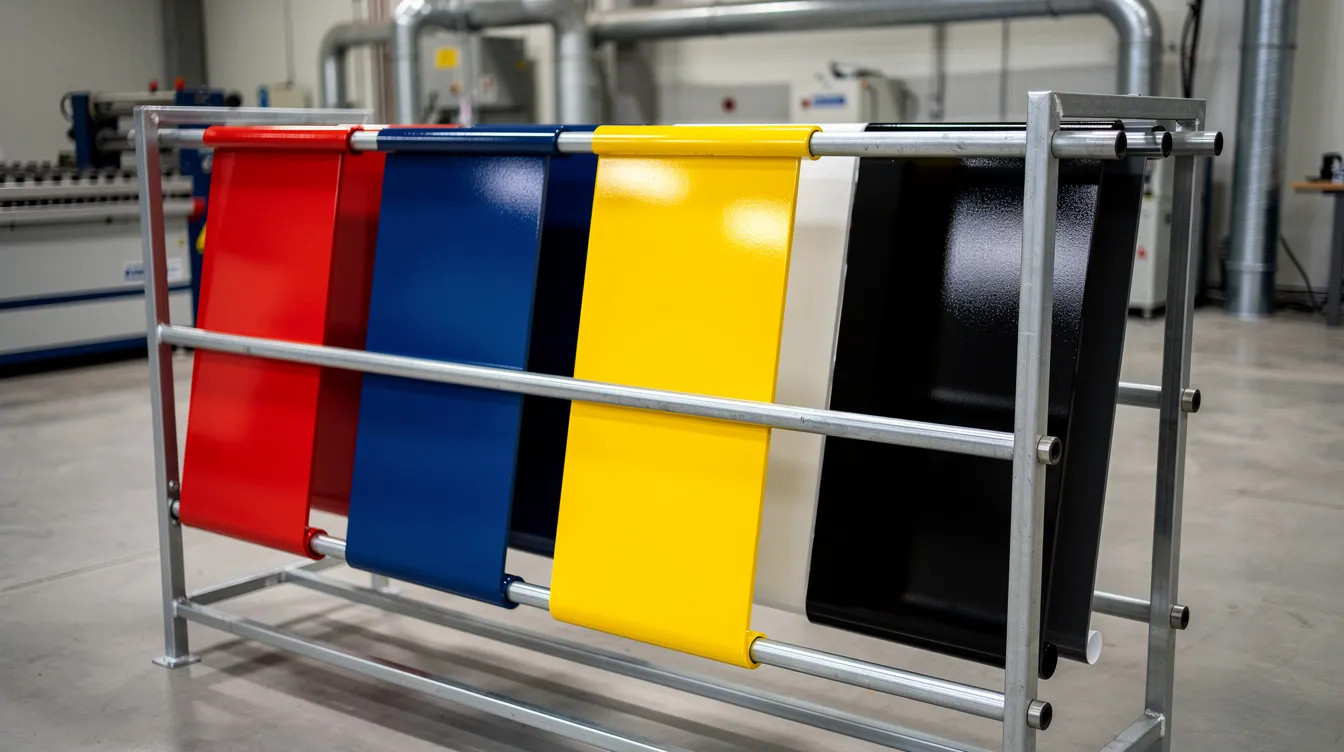
Step 4 – Choose and Apply the Top Coat Paint
The choice of paint system depends entirely on the environment the part will face. An indoor electronics enclosure and an outdoor architectural panel have fundamentally different exposure profiles, and the top coat must match.
-
For indoor decorative uses, latex or acrylic paints are suitable for aluminum surfaces and provide good color and finish. Acrylic latex paint is recommended for exterior aluminum due to its flexibility and resistance to thermal expansion cracking. You can even use spray paint from a quality brand for small production runs or prototyping-though production volumes usually demand spray gun application for consistency.
-
For industrial and exterior applications, 2-component epoxy or polyurethane systems are the standard. Epoxy paints are recommended for rough handling applications where abrasion and chemical splash are common (robotics, industrial machinery). Polyurethane enamel is effective for outdoor aluminum projects where UV resistance and gloss retention matter.
-
Satin or semi-gloss finishes often hide surface imperfections better than very high gloss when painting aluminum. High-gloss finishes magnify every scratch, dust nib, and wave-choose accordingly based on the part’s visibility.
-
Multiple thin coats of paint should be applied for better adhesion and finish. Apply 2–3 light coats with appropriate flash time between each. Thin coats let solvents escape and cure properly, reducing runs and blistering versus one heavy coat.
-
Concrete timing example: apply the first coat, wait 15–30 minutes, then apply a second coat. Allow at least 24 hours at room temperature (~20–25°C) before light handling. Full cure for most OEM-grade products takes 48–72 hours. Do not use thinner beyond the manufacturer’s recommendation-over-thinning weakens the film.
-
Large aluminum panels and extrusions are usually sprayed in a booth with controlled air flow. Small CNC parts may be racked and sprayed by manual or robotic sprayers, depending on geometry and volume. If you decided to use a harbor freight spray gun for prototyping, that can work for one-offs, but production consistency demands calibrated equipment.
-
Anebon can integrate painting into the production workflow for OEM clients, coordinating with certified coating partners to meet color and performance specs (e.g., RAL, Pantone, AAMA standards). This keeps the entire process-machining, fabrication, and surface treatment-under one roof.
Step 5 – Seal, Cure, and Inspect the Painted Aluminum
Sealing and proper curing are what turn a good paint job into a durable, long-lasting finish on aluminum. Without adequate cure time and inspection, even a perfectly prepped and painted part can fail in the field.
-
Apply a clear enamel sealer or clear polyurethane coat only where additional abrasion and chemical resistance is needed-marine hardware, industrial machinery guards, outdoor equipment. Not every part requires a clear coat, but where exposure demands it, the difference in service life is significant.
-
Apply at least two clear coats over fully dried color coats. Follow the manufacturer’s cure schedule, typically 24–72 hours at specified temperature. Some systems allow mild heat (40–60°C) to accelerate cure, but avoid temperatures that could affect dimensional tolerances on precision parts.
-
Conduct a basic quality check: run a cross-hatch adhesion test (per ASTM D3359) on a hidden or non-functional area; visually inspect for pinholes, runs, and incomplete coverage-especially at edges, bolt holes, and undersides where film tends to be thin.
-
For large OEM orders, production teams should use standardized inspection documents. If the application demands it, run accelerated corrosion testing such as salt spray per ASTM B117 to validate the finish. Standard spray paint systems on aluminum typically achieve 200–500 hours before coating failure; high-performance powder coats or fluoropolymer systems can reach 500–1,200+ hours when properly applied and pretreated.
-
The hope is to catch defects before shipping, not after installation. A smooth, well-cured finish with verified adhesion saves warranty costs and protects your reputation. Of course, the art of inspection is knowing where to look-rust is not the concern with aluminum, but underfilm corrosion and edge delamination certainly are.
Special Considerations for Aluminum Panels and Architectural Parts
Architectural aluminum panels and cladding face UV, moisture, and thermal cycling that most indoor parts never encounter, so coating systems for these applications must meet stricter performance standards.
-
Coil-coated aluminum panels often use high-performance fluoropolymer (e.g., PVDF) systems that differ from shop-applied paint. These factory-applied coatings meet specs like AAMA 2604 or AAMA 2605, which define performance in UV exposure, chalk resistance, color retention, and gloss retention over 5–10 years of South Florida weathering. Repainting these panels requires careful surface prep to avoid delamination-you cannot simply scuff and spray over a degraded fluoropolymer.
-
Aluminum panels can last up to 40 years with proper preparation and a high-performance coating system. This longevity is the key reason architects and building owners invest in quality finishing rather than cutting corners.
-
When repainting large exterior aluminum panel facades, engineers should consult paint manufacturers for complete system recommendations and warranty conditions. The method of surface prep, primer selection, and top coat chemistry must all be compatible, and the research into system compatibility should happen before the first block of sandpaper touches the surface.
-
Anodizing is an alternative worth considering for architectural parts. The difference between anodizing and painting comes down to hardness, color range, and cost. Anodized Type II sealed finishes can deliver 1,000–2,000+ hours in salt spray testing, often outperforming painted surfaces unless the paint is a high-performance system.
-
Anebon typically supplies smaller architectural components-brackets, trims, CNC-machined fittings-pre-finished to match client-specified panel systems, ensuring color and performance consistency across the assembly.
Aluminum Painting in OEM Production: Process Control and Quality
For OEM production, the aluminum painting process must be repeatable, traceable, and documented. A great finish on one part means nothing if the next batch fails because someone changed the solvent or skipped a sanding step.
-
Standardize the workflow with written work instructions covering every step: cleaning agents and wash temperatures, sand grit sequence, self etching primer brand and application parameters, top coat spray settings, and cure times. Control the process and you control the quality.
-
Document exact products used (primer, paint, sealer), their batch numbers, spray gun parameters (pressure, tip size), wet film thickness and dry film thickness measurements, and environmental conditions (temperature, relative humidity). This ensures traceability and reproducibility across production runs that may span several years.
-
Anebon’s ISO 9001:2015 and ISO 14001:2015 certifications support traceability and consistent quality in painted aluminum parts. These systems formalize non-conforming product handling, corrective action, and inspection records-the stuff that keeps defect rates low and customer confidence high.
-
Concrete examples: painted CNC housings for medical devices where zero contamination is required; die cast aluminum motor covers for robotics that need primer plus top coat resistant to oils, vibration, and coolant splash; sheet metal brackets for EV battery packs requiring durable, conformal coating over edges that resists abrasion and salt water.
-
OEMs should also consider DFM (Design for Manufacturability) review when integrating machining, painting, or anodizing in one supply chain. Design decisions-drainage holes, fillet radii, minimum edge radius, fastener placement-have a large effect on paint durability and cost.
-
If you want to combine machining, sheet metal fabrication, and painting aluminum in a single supply chain, request a quote or DFM review from Anebon. One point of contact means fewer coordination headaches and faster time to market.
More Posts and Resources on Aluminum Finishing
For engineers and sourcing teams looking to go deeper, we regularly publish more posts on aluminum finishing topics covered in this guide and beyond.
-
Related topics worth exploring: anodizing vs. painting aluminum, powder coating on aluminum, CNC machining finishes (surface roughness, tool marks, bead blasting), and corrosion protection strategies for aluminum assemblies.
-
Case studies on painted aluminum panels and complex machined parts can help you benchmark coating performance-particularly comparisons of outdoor service life under coastal vs. inland conditions.
-
Contact Anebon for technical advice on selecting between paint, anodizing, and other surface treatments for new projects. Whether you need a single prototype or full-scale production, we can help you find the right balance of cost, performance, and lead time for your next job.