Critical Requisites for Machinery Blueprints
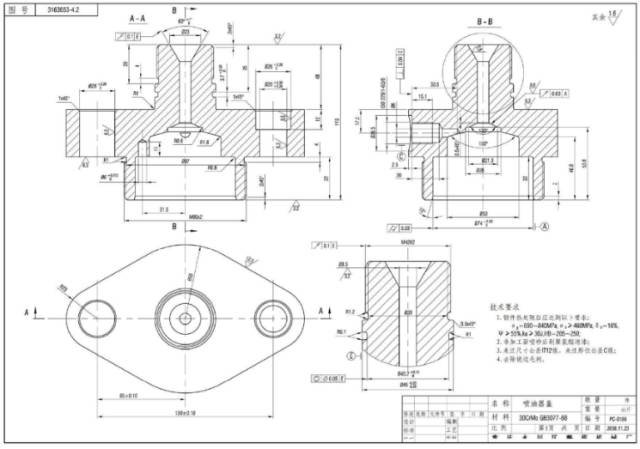
The Technical Requirements for mechanical drawings compiled by the Anebon team covers the following basic requirements directory:
1. General technical requirements
2. Heat treatment requirement
3. Tolerance requirement
4. Part Angle
5. Assembly requirement
6. Casting requirement
7. Coating requirement
8. Piping requirements
9. Solder repair requirements
10. Forging requirement
11. Requirements for cutting workpiece
▌ General Technical Requirements
1. Parts remove oxide skin.
2. On the surface of the parts processing, there should be no scratches, bruises and other defects that damage the surface of the parts.
3. Remove burrs.
▌ Heat Treatment Requirements
1. After tempering treatment, HRC50 ~ 55.
2. Parts for high-frequency quenching, 350 ~ 370℃ tempering, HRC40 ~ 45.
3. Carburizing depth 0.3mm.
4. High temperature aging treatment.
▌ Tolerance Requirements
1. The unmarked shape tolerance shall meet the requirements of GB1184-80.
2. The allowable deviation of the unindicated length size is ±0.5mm.
3. The casting tolerance zone is symmetrical to the basic size configuration of the blank casting.
▌ Corners and edges of parts
1. The corner radius R5 is not specified.
2. The chamfer without injection is 2×45°.
3. Sharp corners/sharp corners/sharp edges are blunted.
▌ Assembly Requirements
1. Before assembly, each seal should be immersed in oil.
2. Oil heating is permitted for the hot charging of rolling bearings during assembly, with the oil temperature not exceeding 100℃.
3. Following gear assembly, the contact points and backlash on the tooth surface must adhere to the standards outlined in GB10095 and GB11365.
4. In the assembly of the hydraulic system, the use of sealing filler or sealant is permitted, provided it is kept out of the system.
5. All machining parts and components entering the assembly (including those purchased or outsourced) must possess certification from the inspection department.
6. Prior to assembly, parts must undergo thorough cleaning to ensure the absence of burrs, flash, oxide, rust, chips, oil, coloring agents, and dust.
7. Before assembly, it is essential to review the main fit dimensions of parts and components, particularly the interference fit dimensions and related accuracy.
8. Throughout assembly, parts must not be knocked, touched, scratched, or allowed to rust.
9. When securing screws, bolts, and nuts, it is important not to strike them or use improper spanners and wrenches. The screw slots, nuts, screws, and bolt heads must remain undamaged after tightening.
10. Fasteners requiring specific tightening torque must be secured using a torque wrench and tightened in accordance with the specified torque.
11. When fastening the same part with multiple screws (bolts), they should be tightened in a cross, symmetrical, step-by-step, and uniform manner.
12. The assembly of cone pins should involve coloring the hole, ensuring a contact rate of no less than 60% of the matching length, evenly distributed.
13. The two sides of the flat key and the keyway on the shaft must maintain uniform contact without gaps.
14. A minimum of 2/3 of tooth surfaces must be in contact during spline assembly, with a contact rate of no less than 50% in the length and height direction of the key teeth.
15. Upon assembly of the flat key (or spline) for sliding matches, the phase parts should move freely, with no uneven tightness present.
16. Excess adhesive should be removed after bonding.
17. The semi-circular hole of the bearing outer ring, open bearing seat, and bearing cover should not become stuck.
18. The bearing outer ring must maintain good contact with the semi-circular hole of the open bearing seat and bearing cover, and exhibit uniform contact with the bearing seat within the specified range during coloring inspection.
19. Following assembly, the outer ring of the bearing should maintain uniform contact with the end face of the positioning end’s bearing cover.
20. After the installation of rolling bearings, manual rotation should be flexible and stable.
21. The combination surface of the upper and lower bearing bushing should tightly adhere and be checked with a 0.05mm feeler.
22. When fixing the bearing shell with a positioning pin, it should be drilled and distributed to ensure proper alignment with the relevant bearing hole. The pin must not loosen after installation.
23. The bearing body of the spherical bearing and the bearing seat should be in uniform contact, with a contact rate of no less than 70% when checked with coloring.
24. The alloy bearing lining surface is not to be used when it turns yellow, and the nucleation phenomenon is not allowed within the specified contact angle, with the nucleation area outside the contact angle limited to no more than 10% of the total non-contact area.
25. The reference end face of the gear (worm gear) and the shaft shoulder (or the end face of the positioning sleeve) should fit without allowing a 0.05mm feeler to pass through, ensuring perpendicularity with the gear reference end face and axis.
26. The combination surface of the gear box and the cover must maintain good contact.
27. Before assembly, it is crucial to thoroughly inspect and remove sharp angles, burrs, and foreign particles remaining from the parts processing, ensuring that the seal remains unscratched during loading.
▌ Casting Requirements
1. The casting surface must not exhibit low insulation, fractures, contractions, or imperfections such as inadequacies in casting (e.g., insufficient material filled, mechanical harm, etc.).
2. Castings must undergo cleaning to eliminate any protrusions, sharp edges, and indications of unfinished processes, and the pouring gate must be cleaned level with the casting surface.
3. The non-machined surface of the casting should clearly display the casting type and marking, meeting the drawing specifications in terms of position and font.
4. The roughness of the non-machined surface of the casting, in the case of sand casting R, should not exceed 50μm.
5. Castings should be rid of sprue, projections, and any remaining sprue on the non-machined surface must be made level and polished to meet surface quality standards.
6. The casting should be free of molding sand, core sand, and core remnants.
7. The inclined parts and dimensional tolerance zone of the casting should be symmetrically arranged along the inclined plane.
8. Any molding sand, core sand, core remnants, as well as any soft or adhesive sand on the casting, should be smoothed out and cleansed.
9. The type of right and wrong and any convex casting deviations should be rectified to ensure a smooth transition and guarantee the appearance quality.
10. The creases on the non-machined surface of the casting should not exceed a depth of 2mm, with a minimum spacing of 100mm.
11. The non-machined surface of machine product castings should undergo shot peening or roller treatment to meet cleanliness requirements of Sa2 1/2.
12. Castings are to be hardened with water.
13. The casting surface should be smooth, and any gates, protrusions, adhesive sand, etc., should be removed.
14. Castings must not possess low insulation, cracks, voids, or other casting flaws that could compromise use.
▌ Painting Requirements
1. Before painting steel parts, it is essential to eliminate any traces of rust, oxide, grime, dust, soil, salt, and other contaminants from the surface.
2. To prepare the steel parts for rust removal, utilize natural solvents, caustic soda, emulsifying agents, steam, or other suitable methods to eradicate grease and dirt from the surface.
3. Following shot peening or manual rust removal, the time frame between preparing the surface and applying the primer should not exceed 6 hours.
4. Before connecting, apply a 30 to 40μm thick coat of anti-corrosion paint to the surfaces of riveted parts in contact with each other. Seal the edge of the lap joint with paint, filler, or adhesive. If the primer is damaged during machining or welding, reapply a fresh coat.
▌ Piping Requirements
1. Eliminate any flash, burrs, or bevels from the pipe ends before assembly. Use compressed air or an appropriate method to clear impurities and residual rust from the inner wall of the pipes.
2. Before assembly, ensure that all steel pipes, including preformed ones, are treated with degreasing, pickling, neutralization, washing, and corrosion protection.
3. During assembly, securely fasten threaded connections such as pipe clamps, supports, flanges, and joints to prevent loosening.
4. Perform a pressure test on the welded sections of prefabricated pipes.
5. When relocating or transferring piping, seal the pipe separation point with adhesive tape or a plastic cap to prevent debris from entering, and ensure that it is labeled accordingly.
▌ Requirements for welding parts repair
1. Prior to welding, it is crucial to eliminate any imperfections and ensure that the groove surface is even and without sharp edges.
2. Depending on the imperfections found in the cast steel, the welding area can be corrected using excavation, abrasion, carbon arc gouging, gas cutting, or mechanical procedures.
3. Clean all surrounding areas within a 20mm radius of the welding groove, ensuring the removal of sand, oil, water, rust, and other contaminants.
4. Throughout the welding process, the preheating zone of the steel casting should maintain a temperature not lower than 350°C.
5. If circumstances allow, try to conduct welding in a predominantly horizontal position.
6. When conducting welding repairs, limit excessive lateral movement of the electrode.
7. Properly align each welding pass, ensuring that the overlap is at least 1/3 of the pass width. The weld should be solid, free from burns, cracks, and noticeable irregularities. The appearance of the weld should be pleasing, without undercutting, excess slag, porosity, cracks, spatter, or other faults. The welding bead should be consistent.
▌ Forging Requirements
1. The water mouth and riser of the ingot must be adequately trimmed to prevent shrinkage voids and significant deviations during forging.
2. The forgings should undergo shaping on a press with ample capacity to ensure full internal consolidation.
3. The presence of noticeable fissures, creases, or other visual imperfections that impair functionality is not permissible in forgings. Local flaws may be remediated, but the depth of correction should not exceed 75% of the machining allowance. Defects on the unmachined surface must be eliminated and seamlessly transitioned.
4. Forgings are prohibited from exhibiting blemishes such as white spots, internal fissures, and residual shrinkage voids.
▌ Requirements for cutting workpiece
1. Precision turned components must undergo scrutiny and approval in alignment with the production procedures, ensuring progression to the subsequent stage only upon validation from the preceding inspection.
2. The finished constituents must not exhibit any irregularities in the form of protrusions.
3. Finished pieces should not be placed directly on the floor, and requisite support and safeguarding measures need to be implemented. Ensuring an absence of rust, corrosion, and any detrimental impact on performance, longevity, or appearance, inclusive of dents, scratches, or other flaws, is essential for the finished surface.
4. The surface following the rolling finishing process should not manifest any peeling occurrences post rolling.
5. Components subsequent to the final heat treatment must not display any surface oxidation. Additionally, the mating and tooth surfaces after completion should remain free from any annealing.
6. The surface of the processed thread should not display any imperfections such as dark spots, protrusions, irregular bulges, or protrusions.
To create more benefit for buyers is Anebon’s business philosophy; shopper growing is Anebon’s working power. For Hot New Products Durable aluminum cnc machining parts and brass milling parts and custom stamping parts, are you still on the lookout for a good quality product that is in accordance together with your very good organization image while expanding your item market range? Consider Anebon’s good quality merchandise. Your choice will prove to be intelligent!
Hot New Products China Glass and Acrylic Glass, Anebon rely on high-quality materials, perfect design, excellent customer service and the competitive price to win the trust of many customers at home and abroad. 95% products are exported to overseas markets.
If you wanna know more or need to inquiry, please contact info@anebon.com.


